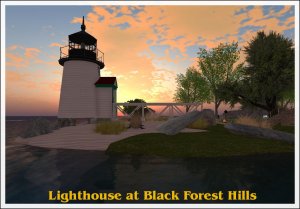
So we have our picture on our PC, and now we want to work on it to make it look like a real picture that we could hang on a wall.
We are going to add a border and a caption to our light house picture.
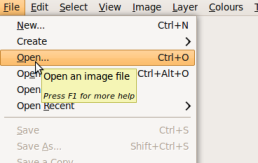
Open Gimp – and then from the File -> Open, I open the final image.
The Lighthouse picture will open in a brand new window, along side the normal GIMP docks.
Note : My Gimp opens with the Main toolbar, and the Layers,Channels, Images Docks both open – depending on your set up, yours might not.
Add a new Layer and call it “Border”, use either the New layer button on the Layers dock, or use the Layer Menu on the main Window and choose “New Layer…”. Don’t change the size of the new layer.
With the New Border layer Selected in the Layers Dock, go to the main window and Select Everything – Select -> All
Now – still with the the border Layer selected, Shrink the Selection by 20 pixels
You now should have a flashing line – inset from the edge of your picture. Currently the area selected is the area inside the flashing box, but of course you need the border in the area between the flashing line and the edge.
Invert the Selection –

Main Window -> Select -> Invert. This now means the area between the flashing line and the edge is selected. Inverting the selection changes what is selected and not selected.
You now want to choose a colour for your border
Click on the colour picker tool in the Main toolbar. This will open up a colour chooser dialog, so pick a colour which will work – I chose a simple white border.
Then click on the paint bucket tool, and move the cursor over the main picture window, so it is between the flashing line selection and the edge of the picture, and click. This will fill the selection with your chosen colour
You now have a border around your picture.
That seemed like a lot of steps – but you soon get used to it, and there are short cuts you can use if you do things often : You can use Keyboard Accelerators (Ctrl-A is the same as Select -> All etc), and there are things which will be covered in later posts.
Also don’t be worried about making mistakes – GIMP has an undo feature (On the Main window – Edit -> Undo – or Ctrl Z).
Adding a caption/Title
To add a caption you need to use the Text Tool

.
Having chosen your Font and colour – click on the main image where you want your text. . GIMP will automatically create a new Layer, and open a dialog box for you to type into. Don’t worry if you don’t get the positioning exactly right, you can move your text later


